Wednesday, June 27, 2012

Trapping Tinkerbell

Tonight, Kaylen and I made a Tinkerbell trap complete with a bed and "lost things" for her to keep.
We had a lot of fun making this trap and we hope we will get a peek at Tink one of these days :()

We took a box and wrapped it with polka dot wrapping paper and then taped streamers to the opening so Tinkerbell could easily get in and out of the box.


We made her a bed made out of popsicle sticks and cotton balls (for comfort) and then covered it with some pink polka dots fabric to look like sheets. We hand stitched a little pillow so Tink would be nice and comfortable while she rests in her new place.


We left some "lost things" in the box for her because we know how much she likes to tinker.

We left crayons and paper so that Tink can draw pictures to decorate her new hang out.

We also left pipe cleaners, feathers, a flower, thread and needle, rings, mini clothes pins and some beads that spell out Kaylen (in case Tink wants to make Kaylen something special.)


 We also left some pixie dust in case she forgot to bring her extra supply with.


We tucked everything nicely into her little box and we set it on a shelf so that the next time she visits she will have a nice place to stay.


********** UPDATE **********

This morning when the kids woke up, they found Tinkerbell sleeping on the bed... Apparently sometime last night, she kicked over the pixie dust while she was trying to climb into bed. They found the dust all over the floor with her foot peeking out. (I used one of Kaylen's Tink dolls and snuck her in after the kids went to bed.) They were so excited to see her in there this morning... so excited that I had to calm AJ down because he was talking a mile a minute and jumping up and down! This was such a fun project. :)

Monday, June 25, 2012

Baseball (Part 2)

I posted about baseball early in this blog and am just now thinking I should have tried to coordinate a little better... oh well!

Today we watched Everyone's Hero which is a cute baseball movie about a boy who goes on a rescue mission to try and clear his dad's name. My kids LOVE this movie and asked me last night, before they went to bed, if they could watch the movie. I, of course, agreed because I also love this movie!

We did a quick craft before hand which was pretty easy and then sat down to watch the movie.

We took a funnel we had and traced around it to make a circle for our baseball. You can use a bowl or free hand it too.  I have been trying to teach my kids that things don't need to be perfect. All I ask is that they try their best.

We had a little meltdown when it came to the bat... which was another chance to remind the kids about the above message. About 30 minutes after crying about how horrible she was at things, Kaylen decided she would give it another try and made her bat.


We free handed it and then wrote Little Slugger Bats on it. I didn't have any  bats on hand to look at, so I was just kind of winging it. Making the craft got the kids excited about baseball and the upcoming game they are going to but the movie was the best part. They laugh and laugh and laugh. Really, it's the best sound in our house!

Chore Charts

A while back I made a chore chart for the kids. At first, they did really great with it... then... we kind of lost interest and stopped using it. After pulling my hair out yesterday and telling the kids for the 100th time to pick up their rooms, I decided the chore chart was going to be used again...


We found this pocket chart at Staples (you can buy it in store or find it here.) We picked up some colorful index cards and "went to town." We have the days (Mon-Sun), Months, #'s (1-31) and the year as well as a card for each chore we came up with and activities and crafts the kids can do...

After we had the date section all figured out we sat down and came up with a list of chores we thought the kids were capable of, we even let them pick out a few of their own (like feeding the fish or walking the dogs).


Below our chart are envelopes with our index cards on them. Each day, the kids change the dates and then I put up the chores and activities we will be doing.


Here is a closer shot... sorry for the bad photo, my camera flash wasn't working with me.

The left side is the list of chores, the right side is the activities.


We also have a little stand near by that has stickers and some extra cards on it in case we need to add more to our list.

The kids get a sticker for every chore they complete for the day. Sometimes they will wear the sticker, other times they put it in a notebook... or if your name happens to be AJ and you are 3 years old, they tend to end up in random places that I have to use a razor blade to remove at a later time... oh joy!

(Disclaimer... the lighter on top is not used by the children... I only have it for working with my paracord crafts so, as of late, it hardly ever gets used anymore... )

Friday, June 22, 2012

Photo Booth

Kaylen went to a birthday party a couple months ago where they had an actual photo booth! I thought this was such a fun idea. I saw an idea on Pinterest (here) where a bride and groom were having their picture taken behind a hand made Polaroid frame and thought it would be cool to make our own "Polaroid."

I asked my husband if he thought we could make something out of wood and he went to work. :)  He cut a frame out of some scrap wood we had in the garage... luckily we have a lot of scrap wood because I often come up with projects for him!

After he cut the frame, I sanded it down and then painted it with a couple of different coats of white paint. Once the white paint had all dried, I taped of a section and painted it with chalk board paint. The idea is to be able to write who is in the picture and to be able to change it often, chalk board paint seemed the easiest option.

Once everything was dry, we set it up and tested it out. We will eventually put hooks in it so we can hang it up for parties or events where we would like some fun pictures instead of having to prop it up.

You can use a natural background to take pictures or hang a drop cloth behind it so you have a plain background. You can also incorporate different props or costumes for people to wear in their pictures for a fun touch. The kids really like this project and Kaylen can't wait to try it out at her birthday party later this summer!


With the piece that was cut out of the middle, I made a magnetic chalk board. I sanded it down, painted it with a magnetic paint and then topped it with chalk board paint. Tomorrow we will be making our very own magnets!


Marble Painting

Our project today was marble painting. This was such a fun project and we will be definitely doing it again. Kaylen did a project similar to this in school and she was able to give me a few of the tips they used in class. This is a perfect project for little ones who want to paint!

Supplies you will need:
Construction paper
Paints
Shoe boxes, cake pans or any other container that's easy to move around


 Start by putting your construction paper into your container. Kaylen cut hers into the shape of an egg but you can trace the bottom of your container to get the same shape as the container. We did squares, circles, rectangles, etc...


There are a couple of different ways to paint with marbles. We started by putting our paints into small containers so they were easier to work with. We just used some sturdy cupcake holders.


Start by dipping your marble into a paint color and then place it into the container. Move the container around until the marble leaves a trail you are happy with.

Add different colors to your picture until you are satisfied with the outcome.


This was Kaylen's first painting.


AJ showing off his first painting.


Another way you can do your painting is by putting the paint in first and then adding the marbles until it looks the way you would like it.


We used different sized marbles to get different textures.


When you are done with your paintings, let them dry.

We set ours outside to dry so we had to use some clothespins to keep them from flying away. :)


When they have dried, you can display them in frames, on your refrigerator or turn them into cards. The possibilities are endless with this project.

We hope you love it as much as we did!


Thursday, June 21, 2012

Decorative Soup Cans


Wondering what to do with all those soup cans you have emptied out? Instead of tossing them in the recycle bin, think about up cycling... We simply glued decorative scrapbook paper to our cans and ended up with cute holders for our markers.

You can put any number of things in these cans... pens, pencils, scissors, markers, etc... Just use your favorite paper and glue it to the can. You can add ribbons or stickers to make it more personalized if you want to give them as gifts.

You might even consider hot gluing fabric to the cans for a cute touch. The possibilities are endless.

Rainbow Cake

To keep in theme with our rainbow day today (see Rainbow Slush post), we decided to make a rainbow cake. We saw an easy recipe on Pinterest but when we clicked on the link there only directions were in Chinese, so we followed the pictures... so here is our version of the rainbow cake we saw.

Ingredients needed:

1 box of white cake mix
1 3.4 oz box of vanilla pudding
1 20 oz. bottle of Sprite
Frosting
Food Coloring


Mix together cake mix, pudding and entire bottle of Sprite. Mix well!


Divide mixture into 6 bowls (depending on the number of colors you would like). We put about 3/4 cup into each bowl. Add food coloring until you have reached the desired colors.


Spray pans with cooking spray and lightly flour.
Divide half your first color and spread onto your pan. Shake the pan until it is spread enough where you can add another color on top. We didn't move ours around enough and the red disappeared under the other colors.


Keep adding colors until all of your colors are in the pan. Should look something like this.


Bake cakes according to directions on the box. (We baked ours at 350 degrees for 32 minutes.)

Let cake cool and then turn out carefully. The cake is quite sticky so be careful when trying to get it out of the pan and onto the surface you will frost it on.


Frost cake and add sprinkles, if you would like.
Then enjoy!


My mom made the same cake today and they really liked it. My kids really weren't big fans of it and just ate the frosting. It does have a different kind of texture so be prepared for different.

You can do the same kind of thing if you prepare the cake according to the back of the box instead of adding the Sprite and pudding. I think we will do that instead.

Rainbow Slush!

This year for my daughter's 6th birthday we are having a rainbow themed party. While scouring the Internet looking for ideas for games, food and drink, I came across a blog (Ramblings from the Sunshine State) that featured Rainbow Slush. This ties perfectly into our theme and will be an easy drink to make for our party. I tried out a smaller version today.

Start with frozen popsicles. We used Fun Pops from WalMart. You can usually find these for under $3.

Start with your bottom color and smash it with a fork. Place that on the bottom of your cup and then do the same with the rest of your colors until your cup looks like a rainbow.


I would suggest putting your cups into the freezer while mashing up your colors. We didn't at first and the blue melted into the purple before I got the green layer on.

When layered how you would like (doesn't have to be rainbow, can be any combination of colors) give your kids a straw or spoon, or both, and let them enjoy this tasty drink!


Such a multi-tasker... dunking her chicken nuggets while enjoying her drink. :)


He is concentrating so hard that he almost looks mad! Ha ha!

These were a big hit and all I had to do was mash a few popsicles up! Super easy!


Wednesday, June 20, 2012

Baseball

Alright Nebraska fans, if you or someone in your family is in the military and you like baseball, you need to check this out.

Monday nights at Haymarket Park you can watch Saltdogs Baseball for free... yes, FREE! Monday night at the ballpark is Military Appreciation night and all military personnel and their families get in free. The seats are pretty great too! You can sit lower deck along the baseline or upper deck.  Just go to the ticket office box and show your military ID.

We sat upper deck and had a great view of the game. The kids had a lot of fun but got antsy really quickly. There is a playground and about 4 bounce houses that they wanted to go play in. The bounce houses have a cost but as far as I know, the playground doesn't. There are tons of places to get food and a cute little gift shop. (Ben and I already had Saltdogs shirts from previous seasons but we had to get the kids all decked out too hahaha).

If you are looking to save money and do something fun, this is a great idea. The kids were especially excited to meet the team mascot Homer, the Home Run Dog. I would recommend bringing some cash for ice cream or some of those little food shops that don't take credit/debit cards. All in all, we had a great time but now we will be prepared for next time! Maybe we will see you there :)

Also, if you are planning a baseball party for a certain little someone who will be turning 4, like we are, hitting the ballpark will give you a lot of great ideas. We found some really cool ideas for birthday presents as well as idea for games to play at the party. Hope it will be as cool as I am imagining it :) (Stay tuned for that post...)


 AJ at the game!


Kaylen at the game!


The kids with the Saltdogs mascot, Homer


Sunday, June 17, 2012

Father's Day

I had been meaning to get this post finished BEFORE Father's Day but things got a bit crazy here! The kids have been incredibly "active" this past week or two and it's been a journey trying to keep up with them.

We worked hard on our Father's Day gifts this year. Normally, we would get Ben a gift card to Home Depot or Lowe's so he can get whatever he likes... this year, we wanted a more personal touch so we went with homemade gifts.

I hadn't intended on going with any theme this year but what we ended up with was a bunch of "hand print" crafts... it worked out quite well...


The first project we worked on was a card.
I traced one hand onto a folded piece of construction paper so that when cut out it formed a heart. We glued it onto the paper and free handed to words "Hands Down Best DAD."
The kids then colored it in how the wanted it to look .


Next was actual hand prints. I took two plain white canvas and painted them black. I then painted the kids hands white and placed them on the canvas. This was an extremely easy project... until I went to get Kaylen cleaned up (she went first.) After we washed her hands I found AJ had smeared white paint all over the left canvas and we had to start over... boys!!!


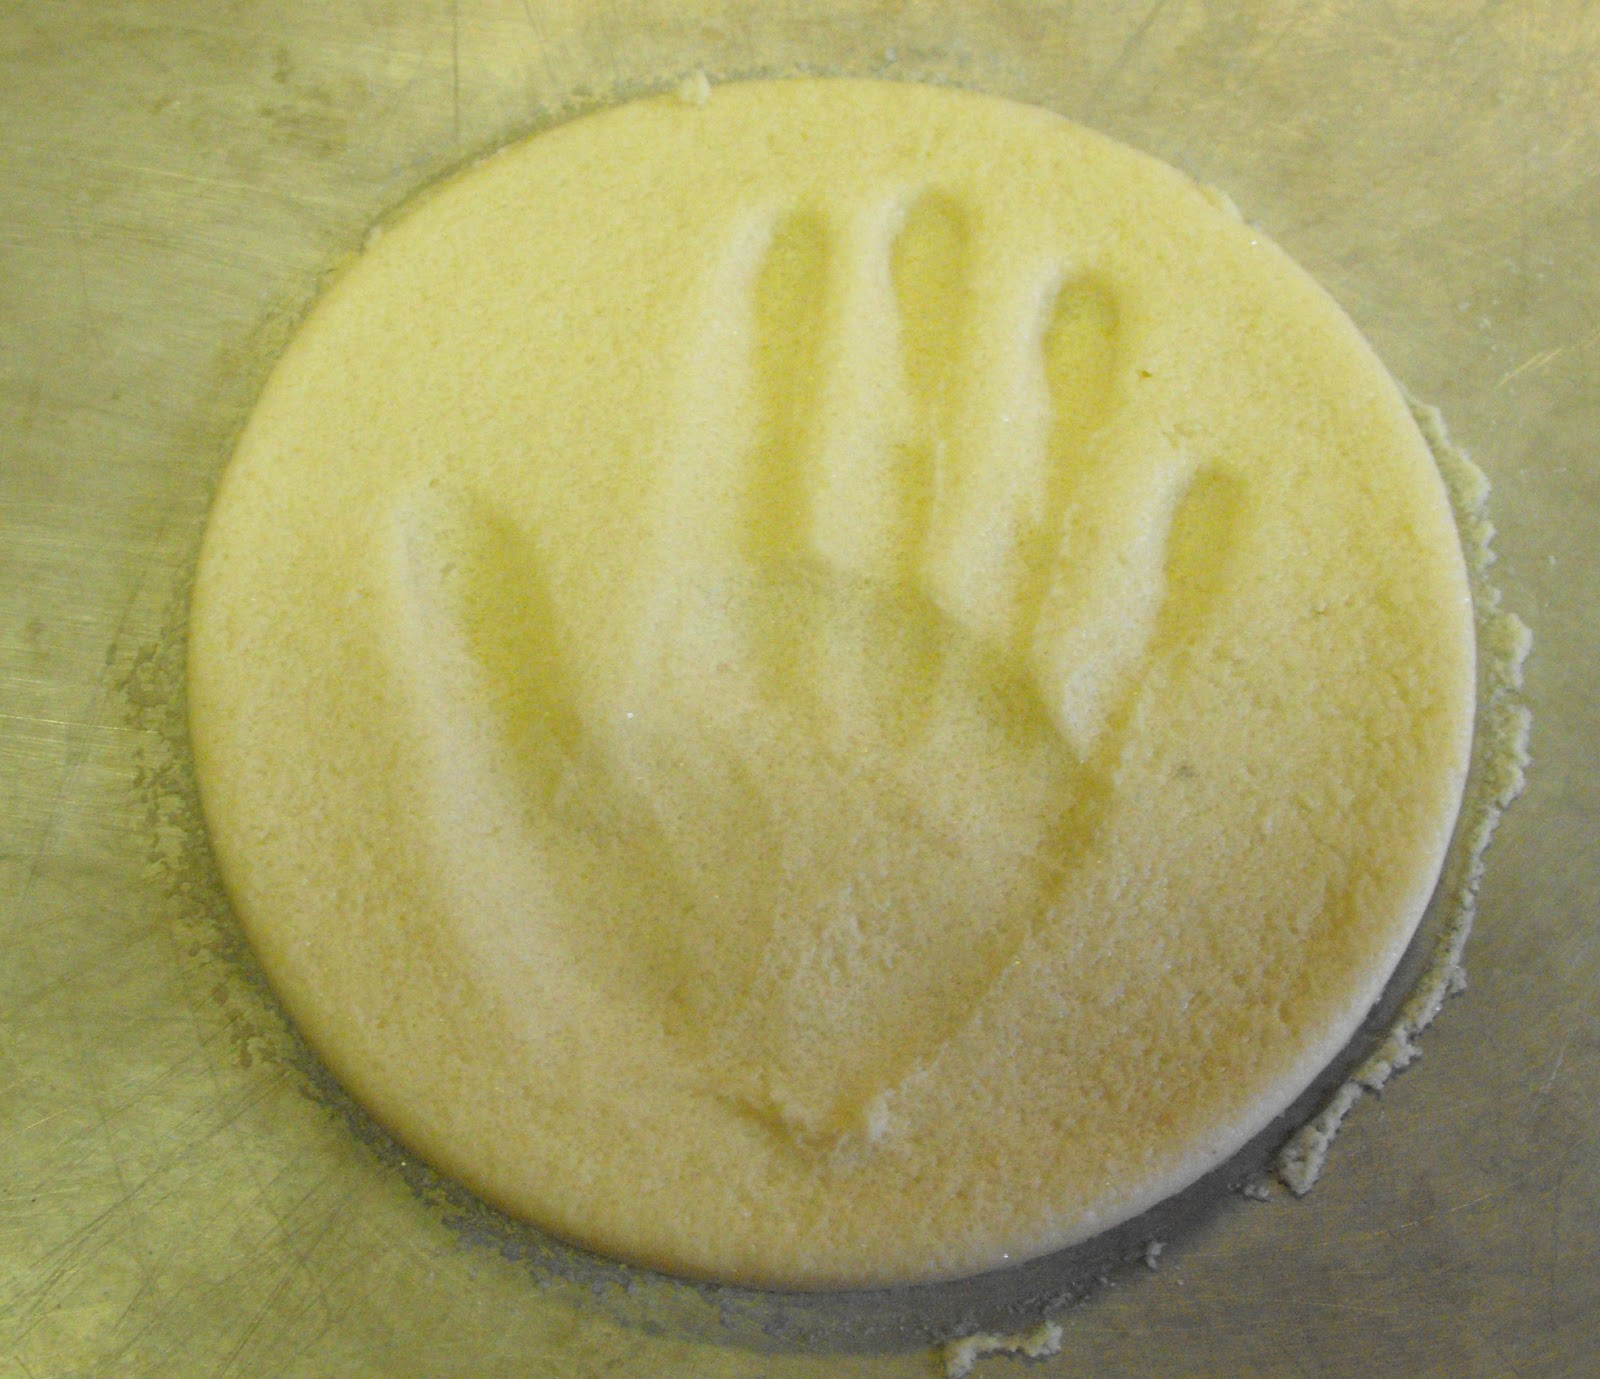
Our next project was a mold of the kids' hands. This one got a bit messy... but you shouldn't have any problem with it, I just have kids who like to be messy.
Take 1/2 cup flour, 1/2 cup salt and 1/4 water and mix it all together. You will get a soft dough like mixture.
I suggest putting it onto a baking sheet before rolling it out because it does tend to get sticky.

After we rolled ours out, we placed a bowl on top and used it like a cookie cutter to get the shape we wanted.

Press the hand into the dough until you like the mold. I suggest pushing down a little farther than what you normally would just because it will rise when baking. Once you have everything the way you like bake at 200 degrees for 3 hours. Once it has baked and cooled you can paint it or leave it just plain. Because of the salt it will look like it has glitter in it, which I think is kind of cool.

We decided to paint ours which is where things got messy. I set the kids down with their paints and their hand prints. I should have supervised a little better because before I knew it the kids were covered in paint... literally from head to toe...


It took me an hour to get them clean and the paint wasn't completely out of Kaylen's hair... luckily they were wearing paint shirts otherwise their clothes would have been ruined.

While I think this was quite funny, I would recommend checking your paints to make sure they are washable and kid friendly before they get all messy... and avoid hair... three shampoos later and the paint finally came out of Kaylen's hair. :)


So, back to the project. The kids painted more of themselves than the actual project. Since they used such dark colors, I had to go back and highlight the hand print in white. I am sure if we hadn't been working on this a half hour before Ben came home from work it might have been more successful... but they still turned out alright.


For our final project we traced everyone's hand (we traced Ben's a week or two ahead of time) onto colorful construction paper. We cut the hands out and then glued them on top of each other. We started with dad, then mom, then Kaylen and ended with AJ (we went age and size order.) This was an easy project and can be done in about five minutes, depending on how fast you can cut and glue.


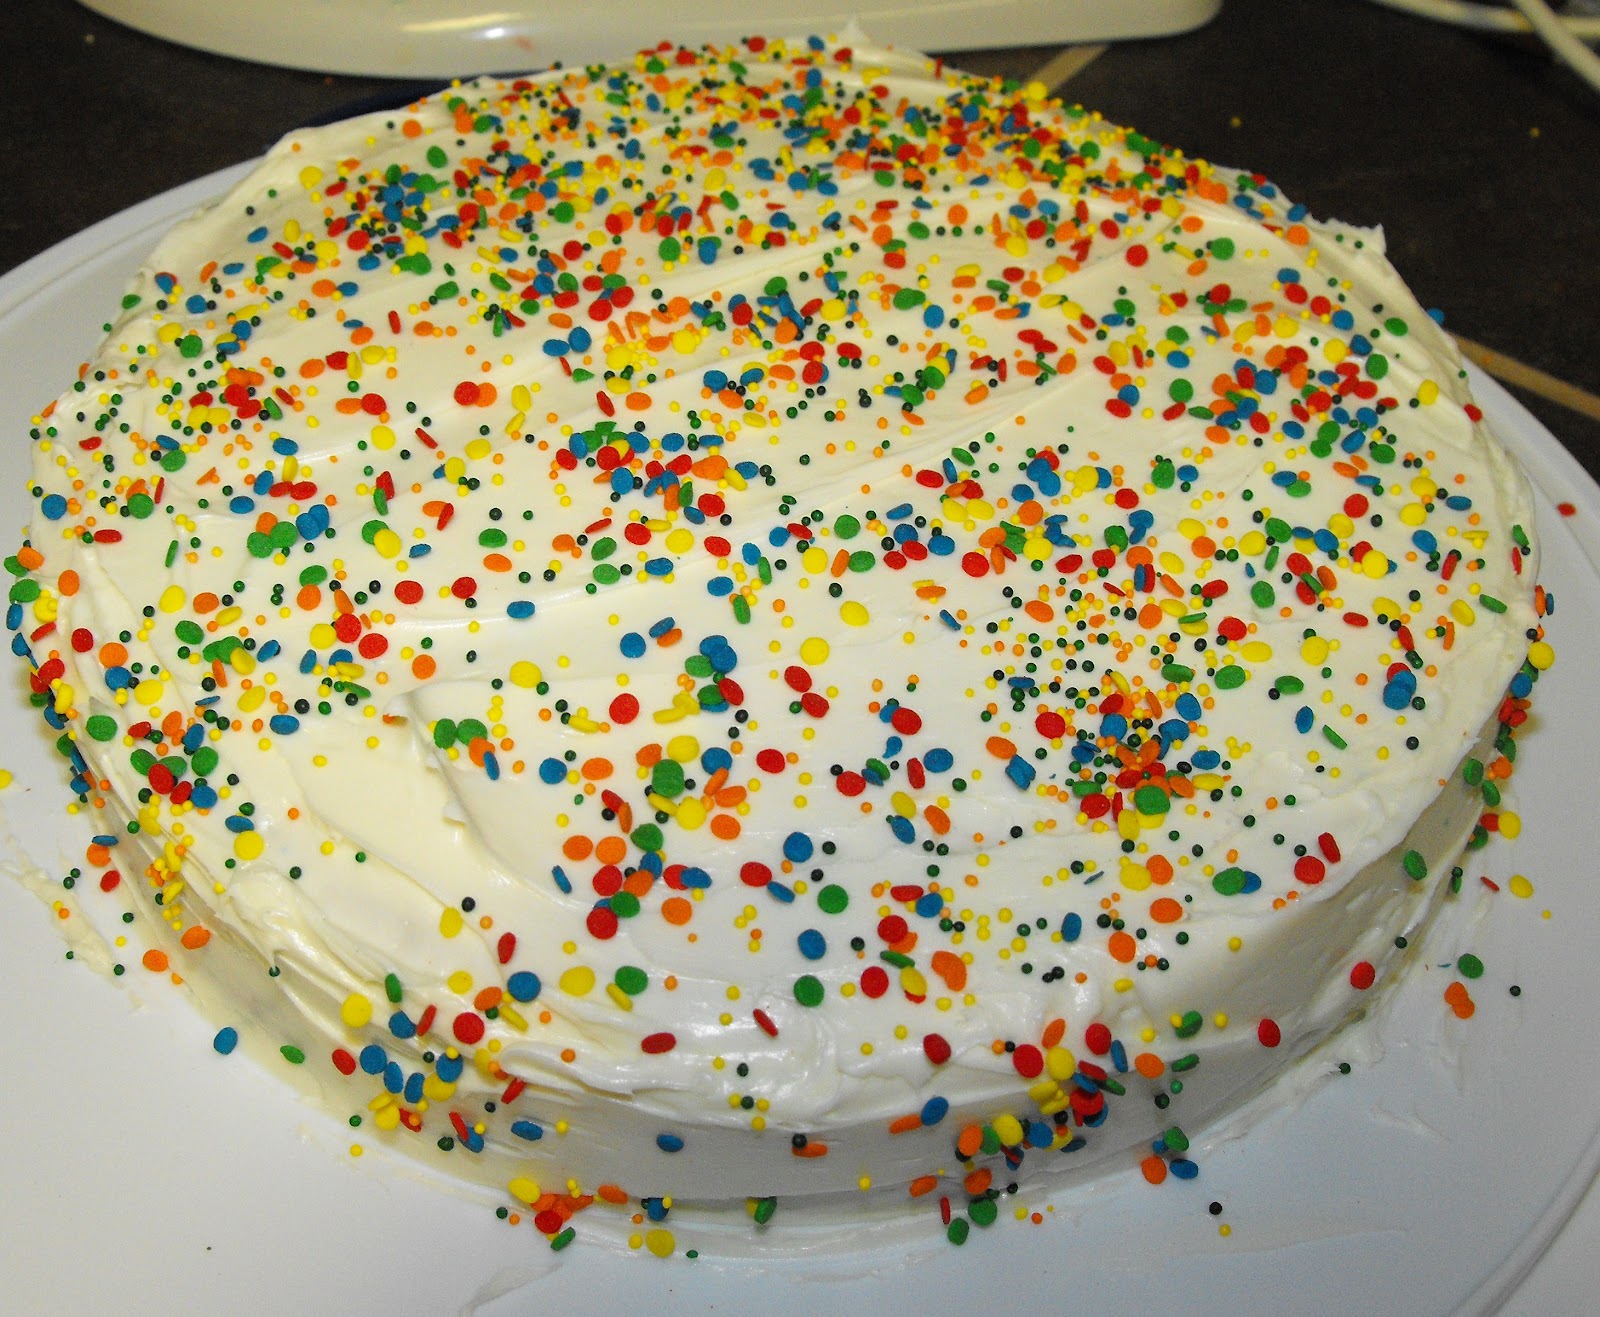
Again I sat the kids down with the paint... this time, no mess! I put some plain construction paper in front of them and they painted pictures on it (and watched t.v. at the same time.) We used their painting as wrapping paper for the canvas project.

Ben seemed happy with his gifts and the kids had a lot of fun making them. I think they had more fun making a mess and watching me pull my hair out but it was still fun. :)

We hope everyone had a great Father's Day!!!

Friday, June 8, 2012

Cinnamon Rolls

This morning we made homemade cinnamon rolls for breakfast. It was fairly easy and now the house smells great!

Here's how we made our rolls...

Ingredients we used:
1/2 cup butter, softened
1/2 cup granulated sugar
1/2 cup firmly packed brown sugar
6 Tablespoons all purpose flour
1 1/2 Tablespoons ground cinnamon
1 loaf of frozen bread dough


We started with a loaf of bread that had been rising all night.(If you prefer rolls that are a bit sweet, you can use a sweet bread loaf ours was just plain white bread.)

Roll it out to get a fairly large rectangle. Using a silicon mat will help and not leave as much of a mess to clean up.


Mix butter, sugar, brown sugar, flour and cinnamon together until well blended.


Spread the filling onto your rolled out bread dough. I trimmed the edges of mine, in hindsight that wasn't the greatest decision as the filling ran out a bit when heated up. I would recommend leaving a little bit of an edge between the bread and the filling.


This is extremely blurry (sorry about that) but you get the idea. Roll up your bread so it looks like this.


Slice individual rolls from your loaf using a serrated knife. I used a bread knife and it worked relatively well.

Bake for about 15-20 minutes at 350 degrees. Your time will vary depending on the type of oven you have. We have a gas stove/oven so things tend to go a bit faster. Ours took about 12 -15 minutes.


Like I mentioned earlier, the filling kind of ran out of ours. If I had placed them closer together in the pan, this might not have happened. You can also try chilling them for 30 minutes before you bake them.


 For frosting, I used a cream cheese recipe I had from a cupcake book. It's delicious but it makes a ton of frosting. So here is the half size recipe for cream cheese frosting:

4 oz. cream cheese, at room temp
3 Tablespoons unsalted butter, at room temp
1&1/2 cups powdered sugar
1/2 tsp vanilla extract

Mix together cream cheese and butter with an electric mixer until smooth. Slowly sift in the powdered sugar and continue mixing until all lumps are gone. Add the vanilla and mix until fully integrated.

Frost your cinnamon rolls and then enjoy!